Exterior paint has 2 major functions; make your home beautiful and, more importantly, protect your most valuable asset. We’ll be going over the different ways to prepare your home for exterior painting so you get the longest lasting performance for your efforts. See how you can really make a difference in the way it looks and how long it lasts.
Pros and Cons
Choice of color can influencehow long it looks great. Some exterior house paint colors fade faster than others, for instance, and will look tired long before it is time for a recoat of exterior paint. Grays tend to look great for a long time. Even a faded gray color still looks gray. Deep red colors sometimes fade to an orange version of its original color from sun exposure.
Pros
Power washing first. Painting A clean house will last longer.
Remove all loose paint and expose fresh wood fibers with sanding before spot-priming
Cons
Caulking: be sure it is paintable. 100% silicone caulking is not paintable!!
Caulking: do not seal the underside of siding to face of the next course of siding. These spaces should remain open to let any water out that may get behind it.
1- Exterior Paint is amazing for protection and beauty.
Let’s talk premium exterior paint
Exterior paint does an amazing job protecting and beautifying your home. Learn how to get the longest life from your exterior paint with great paint preparation tips.
Exterior house paint is an amazing product! Like we said in the intro, paint only has 2 functions: beautify and protect and it does an excellent job of it. If you put into perspective how amazing premium exterior paint really is let’s take a look at what it is. Paint is applied in a liquid form over a surface at the thickness of your standard kitchen trash bag. Two coats are usually applied so you would have a coating that is a total thickness of about 1-2 mils thick. That is 1-2 hundredths of an inch of coating that can withstand the sun, wind, moisture, freezing temps, blazing heat, and rain. Exterior paint holds up tho the torture of Mother Nature for 20 years or more. That’s 14,600+ days of protection from paint. All that service life from 2 coats of exterior paint- Amazing! But, word to the wise; you must apply the exterior paint over a properly prepared surface. Keep reading to find out why it matters in these exterior house painting tips.
2- Exterior paint preparation is the foundation
Getting the most from exterior paint.
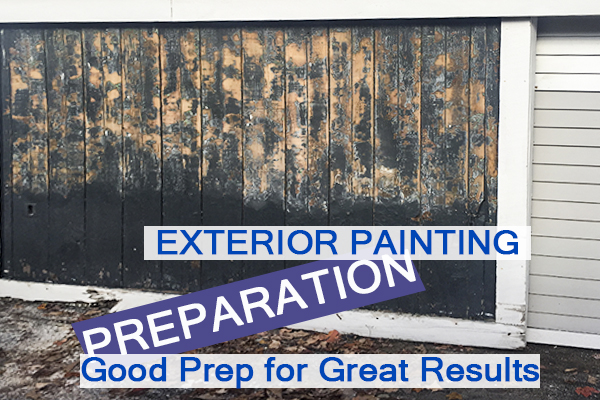
Set the cornerstone of a great exterior painting project with proper preparation. A long-lasting project only happens when you put effort into prep.
Although exterior paint can last a long time and keep your house beautiful it all starts with a great foundation.
Making sure that your home is properly prepared is the key to a long lasting project. Painting contractors know this and should spend the bulk of their time on preparation. We’ll dive into what the substrate is, the current condition, caulking, priming, color choice, age of your house, application method of exterior paint, masking, washing, and surface preparation.Paragraph
Hitting the sweet spot of all these factors will get you the maximum return to protection and beauty of your most valuable asset.
3- Exterior painting preparation step #1
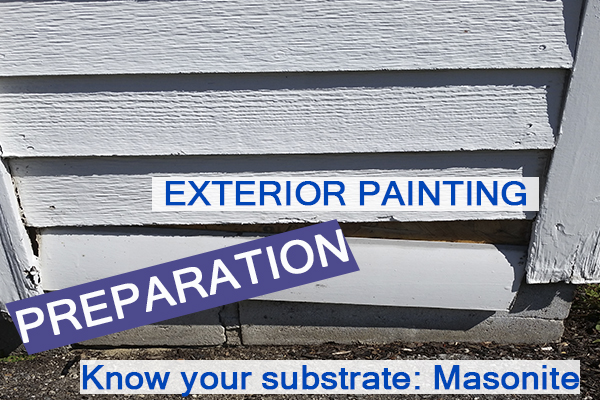
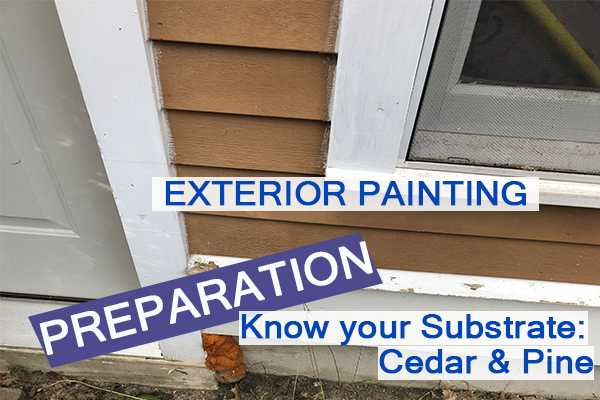
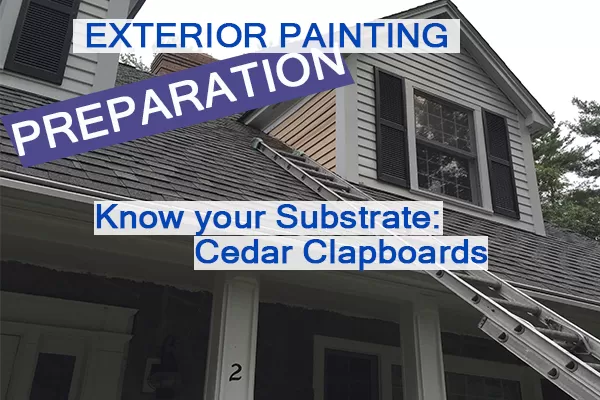
Know your substrate/ Know your surface
Masonite siding can degrade over time. Knowing how to prepare it and keep it sealed from water will give you many years of service.
Preparation methods vary depending on the substrate. Different primers are used for different surfaces like pine, cedar and pvc elements.
Cedar clapboards have tannin in them so an extractive bleeding stain blocker must be used. Knowing what type of substrate it is dictates the type of primer and topcoat.
It is important to know what you are preparing for exterior paint. There are different methods for preparation if it is wood(cedar, mahogany, pine, etc), concrete, masonite siding, cement board, Boral, or PVC all known as substrates.
Each of these substrates may require a unique approach to be prepared, primed and painted. Let’s move on to the next topic, current condition.
4- Exterior painting prep step #2
Asses the current condition
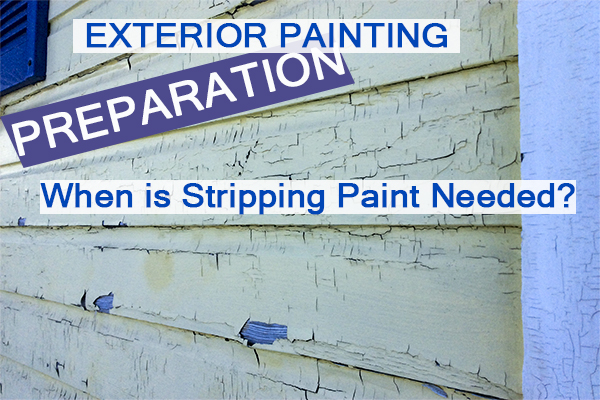
Sometimes it is best to strip All the old coatings off. This results in many years of service from your exterior paint project.
Aligatored paint like this has to go! It is best to remove all the coatings in this situation.
Cedar shingles with grooves like this have limited preparation methods avaialble to remove old coatings. Sometimes it is better to replace the shingles if you have multiple peeling layers.
Knowing what the substrate is makes for a better plan when preparing for exterior painting and so does assessing the current condition of your home. You may have peeling paint, alligatored paint, wood rot, failing caulking and fading around your entire house. You may also have a combination of paint failures on each side. This could be due to sun exposure on your south side that causes excessive expansion and contraction. There could be more rot and mold growth on the north side due to lack of sun exposure.
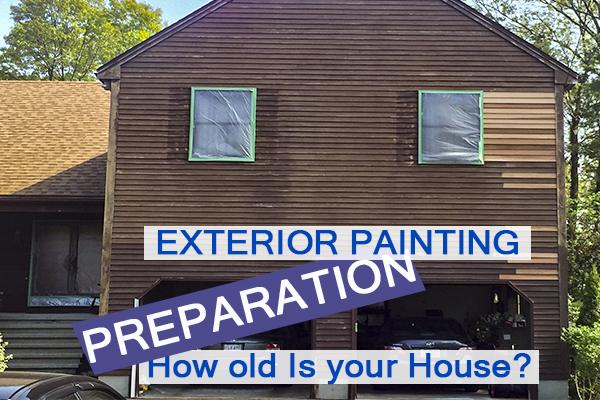
5- Exterior painting prep step #3
Age and type? How old is your home?
Older houses require more attention. We’ll give it the attention it deserves.
This portion is 2-pronged. First thing you should know is how long it has been since it was last painted. If this is an exterior repaint of an existing home it is always great to know what was previously applied to the siding and woodwork. This will help with what type of primer and new topcoat to apply for best results. The second age you should know is what year was the house built? If your home was built before 1978 there is a probability that is has lead-based paint previously used. When scraping or sanding to prepare the exterior for painting you will need to take federally or state mandated precautions to protect from lead exposure. Staying safe when working with older homes is paramount. As you can see the age of your home and the type of paint or stain previously applied(if repainting) is great to know when getting ready to prepare for exterior painting.
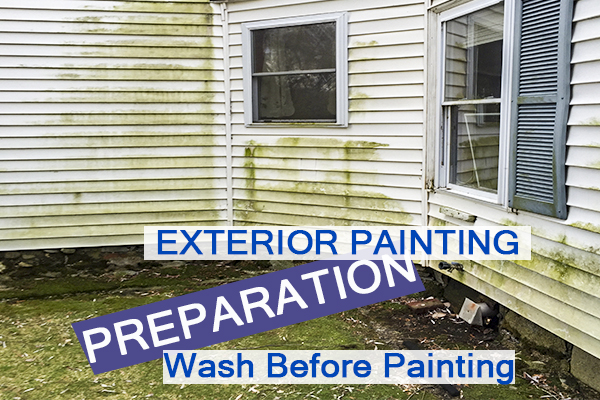
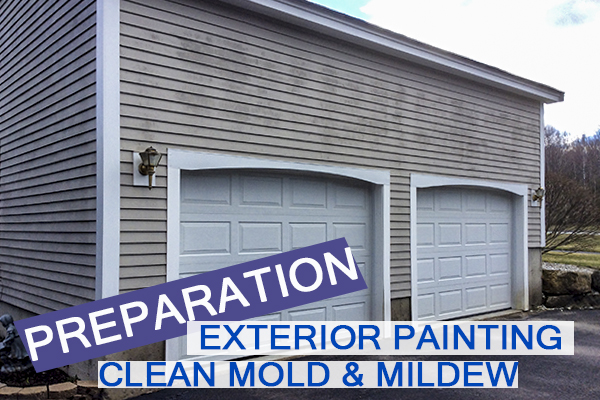
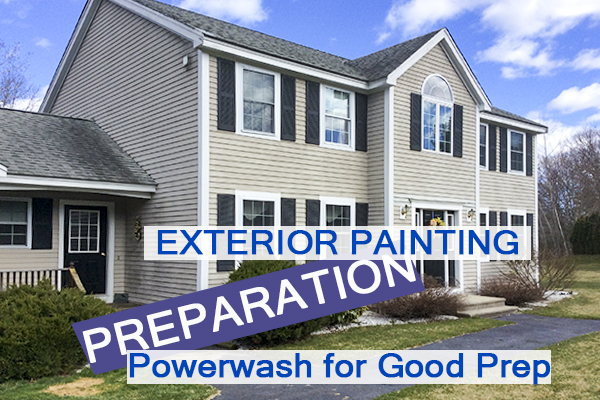
6- Exterior painting prep step# 4
A Clean surface to paint is important
Mold and mildew must be cleaned off before painting. You wouldn’t wax a car over dirt, would you?
Cleaning the siding before painting is a must. Just one of the many steps to preparing the exterior for paint.
Usually the sunny side of the house has oxidation/ fading which causes chalkiness. Power Washing helps clean it off before exterior painting.
So, you wouldn’t wax a car without washing it first, right? The same analogy applies to your home. Cleaning it before painting is like washing before waxing. Pressure washing your home to remove dirt, dust, and mildew before painting makes sure the new exterior paint coatings stick to the surface. It is typical to have organic matter. Like mildew, growing on the North side of the house. Maybe you live close to a busy road and your house is dirty. A good wash with professional detergents is a quick and easy start to preparing your home for exterior painting. Don’t paint a dirty house because it will inhibit the adhesion of the new coatings and lead to premature peeling and problems. Don’t forget to allow proper drying time before applying paints as well.
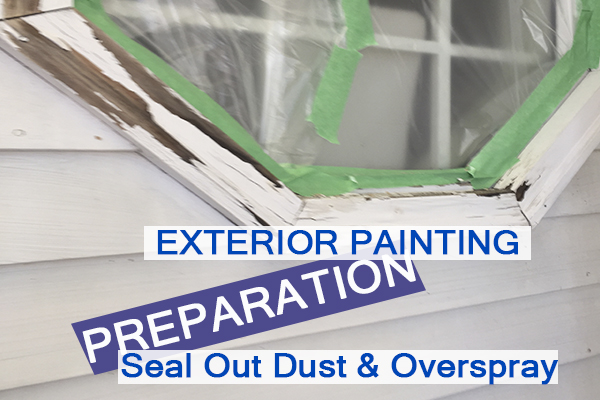
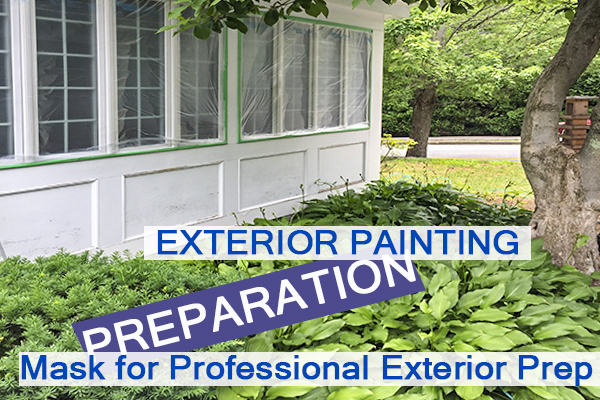
7- Exterior painting prep Step #5
Mask and cover everything for pro paining results
Masking windows and wood rot repairs. Keeping dust out of your house and paint off the glass.
Covering the windows keeps them clean. You don't want dust in your house, right? Or paint on the windows either.
Masking and protection of any adjacent areas to painting prep is a must.
When preparing any surface it is elementary to cover the ground where you are working. This extends to the adjacent areas as well. Covering windows with plastic is a great way to keep them clean and to keep dust from getting indoors. Covering rooflines is important too. Don’t forget about deck railings and small items like spigots and lights on your home. At the end of your exterior painting project you don’t want to have paint or stain on areas that it doesn’t belong. Keeping a clean jobsite gets you professional results.
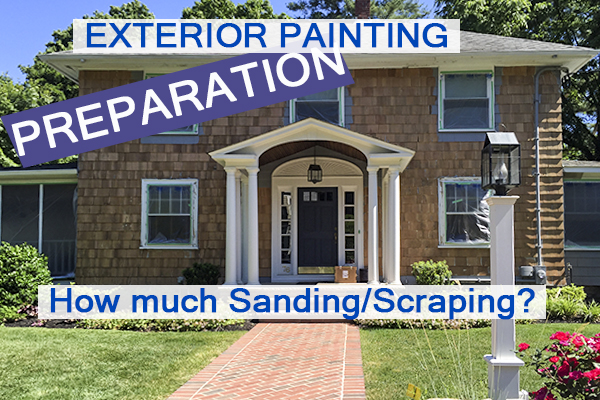
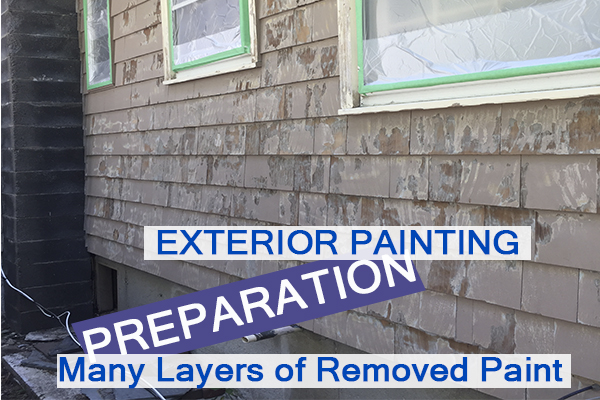
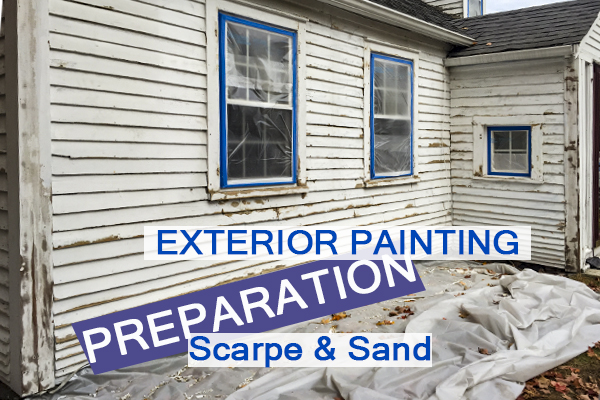
8- Exterior paint prep step #6
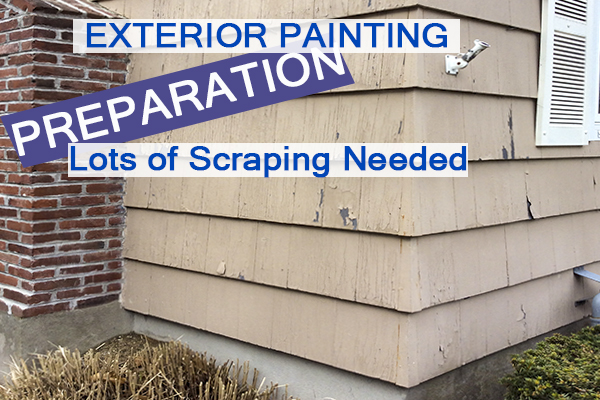
Scrape, sand or strip?
Scraping and sanding sometimes reveals many layers of previously applied paint. It is best for a long- lasting exterior paint project.
Removing all the old failed paint makes the new paint look great. Sanding and leveling the edge between new and old coats makes a smooth surface.
Masking, covering, scraping, sanding…. Lots of “ings” happen to your home before we paint it. Let us do the painting for you.
Complete paint removal. Sometimes it is actually faster to remove all of it than scrape some of it.
This house is naked! No more coatings on the siding. Don’t worry, we’ll get a ‘coat’ on it
Ok, this is the step in house painting preparation that is the most wavering and indeterminate. How much to scrape loose paint, how far to sand, or should the surface be stripped of all coatings? If the project is all new substrates like wood siding and pvc trim woodwork then most of the preparation exists in filling nail holes and caulking before painting. If the house has previous coatings and small patches of peeling paint or chipping paint then you can use a scraper to remove what is loose and then sand the wood to expose fresh wood fibers. This will allow the primer to get the best adhesion and seal the edges of the peeling paint to encumber it from peeling more in the future at the edges of where it previously peeled. Then there are homes with multiple coats of failing paint in large areas. This is a candidate for complete paint removal or stripping of the previous coats. Of course, each of these methods consumes greater amounts of time and resources but when prepared correctly for exterior painting you will get many years of service. If you are getting a quote for exterior painting be sure to get a written scope of work so it is determined in advance what type of preparation for exterior painting will be involved
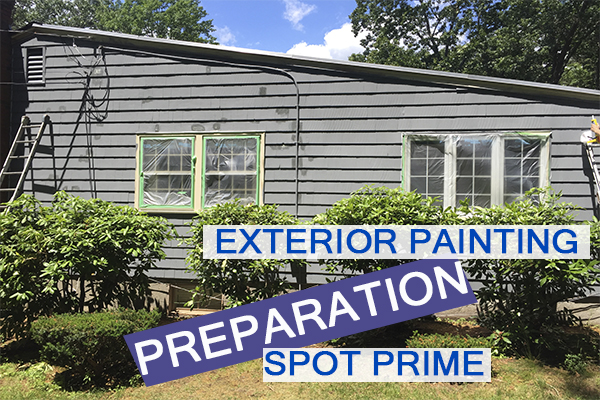
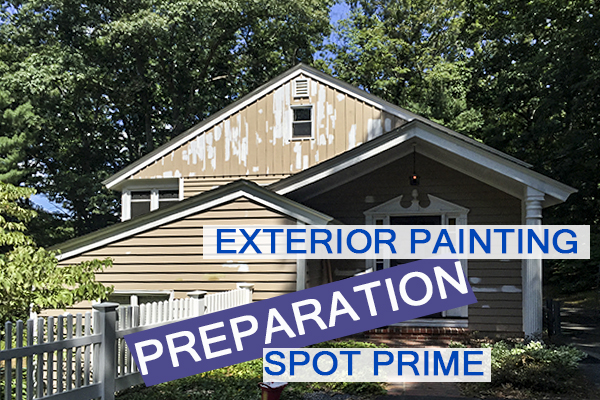
9- Exterior painting prep step#7
Prime for success
Spot priming each nail for rust stains. Sometimes it looks worse before it looks great.
Priming all the areas where paint was removed. One step out of many before painting even starts to be applied.
Bare wood must be primed. All areas that were scraped and sanded get a coat of primer that is meant for the substrate.
Primer is the base layer of a great paint project. Everything else builds on it so it must be done right. This is why you need to know your substrate. Some surfaces may require a specialty primer to effectively work. For instance, if you are priming cedar you typically want to use an oil-based primer since most acrylic universal primers do not stop bleeding of tannins. Although an acrylic primer will not necessarily fail in terms of peeling it will not look good when the finish coat has an orange-brown stain on it that will not go away. There are specialty primers for concrete, tannin bleeding woods, peeling problems, rust issues and stabilizing loose or chalky surfaces.
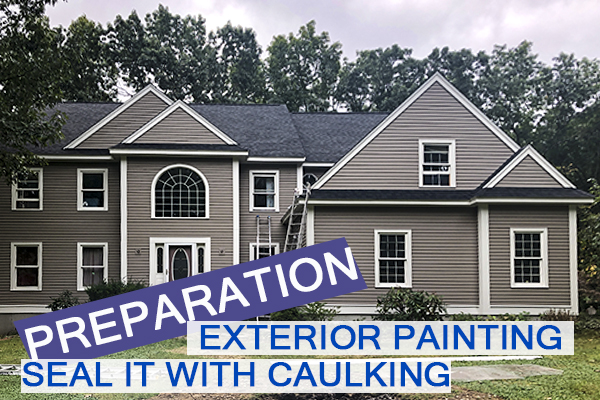
10- exterior painting prep step #8
Caulking for protection
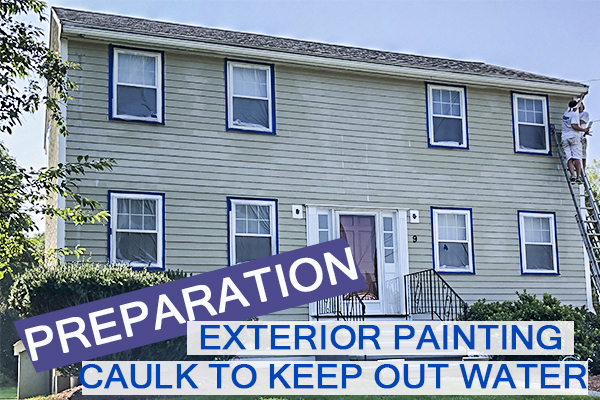
Caulking seals out water and moisture. Water and moisture is the biggest reason for failing paint.
Stop moisture and water infiltration by caulking all open spaces between substrates. Sealing out moisture makes the paint last longer.
Now that you’ve made note of the substrate and the current condition its time to talk caulking.
Caulking is a simple, easy, and inexpensive way to nearly stop all water infiltration. Did you know that excess moisture is the number one cause of exterior paint failures? Caulking seals gaps between boards, helps stop drafts and overall makes for a professionally finished exterior project. There are many different types of caulking. First, make sure it is suitable for exterior use. Second, get the most expensive caulking you can buy. A $5 tube of exterior caulking will outperform the cheaper $1-$2 tubes by as much as 10 times as long. It will stay flexible over a longer period of time and move with the expansion and contraction of the substrate better. Third, make sure it is paintable! Siliconized caulking IS paintable. 100% silicone IS NOT paintable. Caulking should be applied to any seam where 2 pieces of substrate come together and need to be sealed.
Keeping moisture out is imperative to a long lasting exterior paint project preparation using caulking.
11- Exterior painting prep step #9
Type of Application for painting
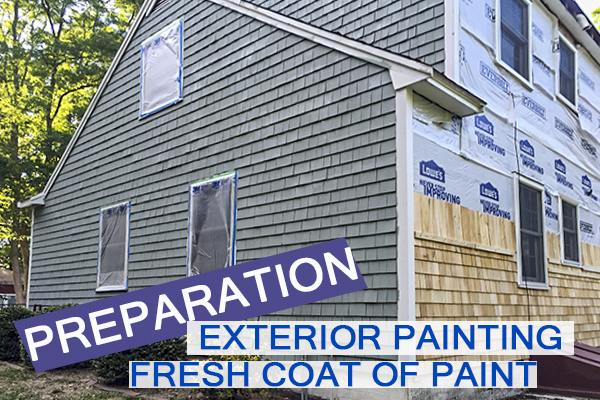
Fresh coats on the side of the house while the back gets replacement shingles. Yes, we do that too.
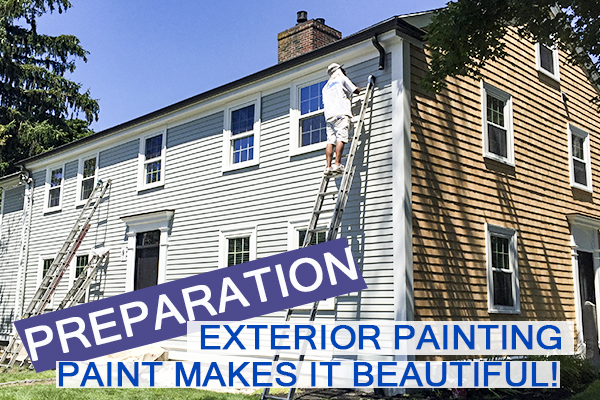
Final touch ups. Beautifully applied paint on a sunny day. This house looks gorgeous.
How you apply paint or stain makes a difference. There are basic ways that paint is applied. Brushing and rolling are the tried and true methods for applying paint. When doing so, especially on exterior painting, the paint is applied and brushed or rolled over the substrate pushing the paint or stain into the irregular surface profile. This wil fill in small pinholes in wood and other surfaces which helps not only seal the wood better, it also helps the paint or stain stick better since it has a deeper profile and more surface area to adhere to. Locally, in Massachusetts and New Hampshire, many homes have wood siding that is installed with the rough side out. This less-smooth side gives more ‘tooth’ and surface area for paint to adhere to as opposed to the smooth side of the siding.
12- Exterior painting prep step#10
Color makes all the difference
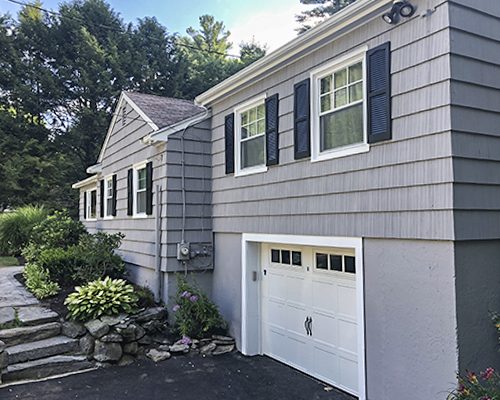
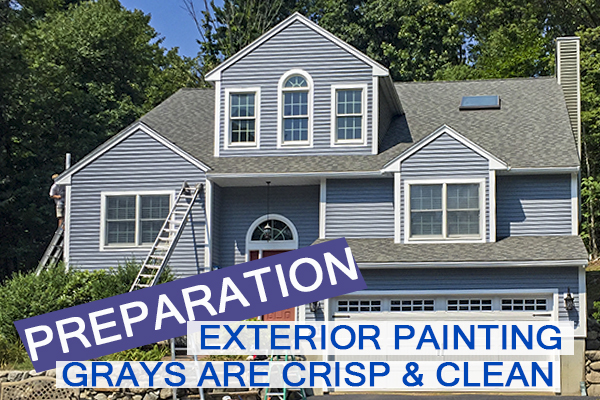
We see a lot of gray houses. One of our favorites.
Color choice for the exterior top coat can also extend the longevity of your project.
We all know that the color(s) you pick to paint your house can make a huge difference in curb appeal. Did you know that certain colors fade faster? This may not be true for every paint manufacturer but, deep reds and some brighter colors have been known to fade faster than others. Red, for instance, can be an orange-red within 5 years or dark blues can fade making it look weathered and in need of repainting sooner than you’d like. Some manufacturers, like Benjamin Moore Paints, have a marking on their color samples that indicate it is not recommended for exterior use for reasons like fading.
Colors like grays and beiges, even when faded still look crisp and fresh for years.
Conclusion
There is so much effort to put forward when preparing a home for exterior painting. We hope this list of exterior painting preparation was of help. Making sound decisions and going the hard road will always pay back in dividends of time. Spend more time on preparation for exterior painting and you’ll have to paint the exterior less often.
If you have any questions on exterior painting services please call or message us any time.
Want to know how much it will cost to paint the exterior of your home?(***Link to how much paint exterior blog
Need an exterior painting contractor or painter near me? We are here to help.


 Skip to content